How To Edit Photos To Look Like In Anime
How To Edit Photos To Look Like In Anime
- adobe
- background image
- charactor
- photoshop
Recently, I often desire to process photos like illustrations and utilise them.
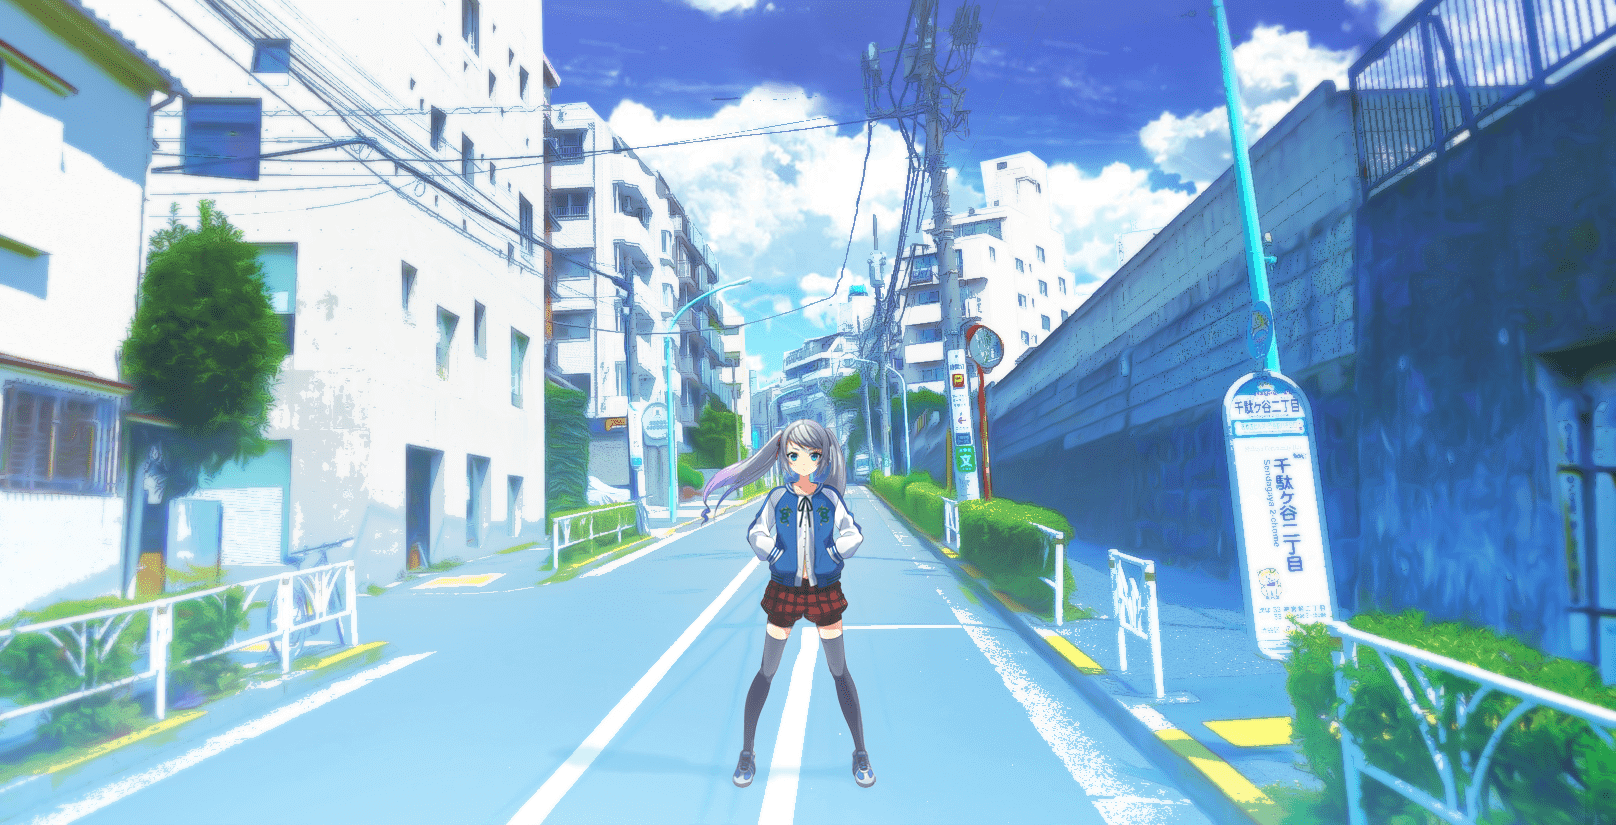
I changed a picture that I took somewhere shut to our company then that it looks similar an analogy, and tried adding our company's grapheme.
Doesn't it wait rather similar to an anime scene?
There are a number of recent applications you tin can utilise to transform pictures into illustrations, but in the following, I will testify you how to practise it with Photoshop.
Create and adapt the base layer
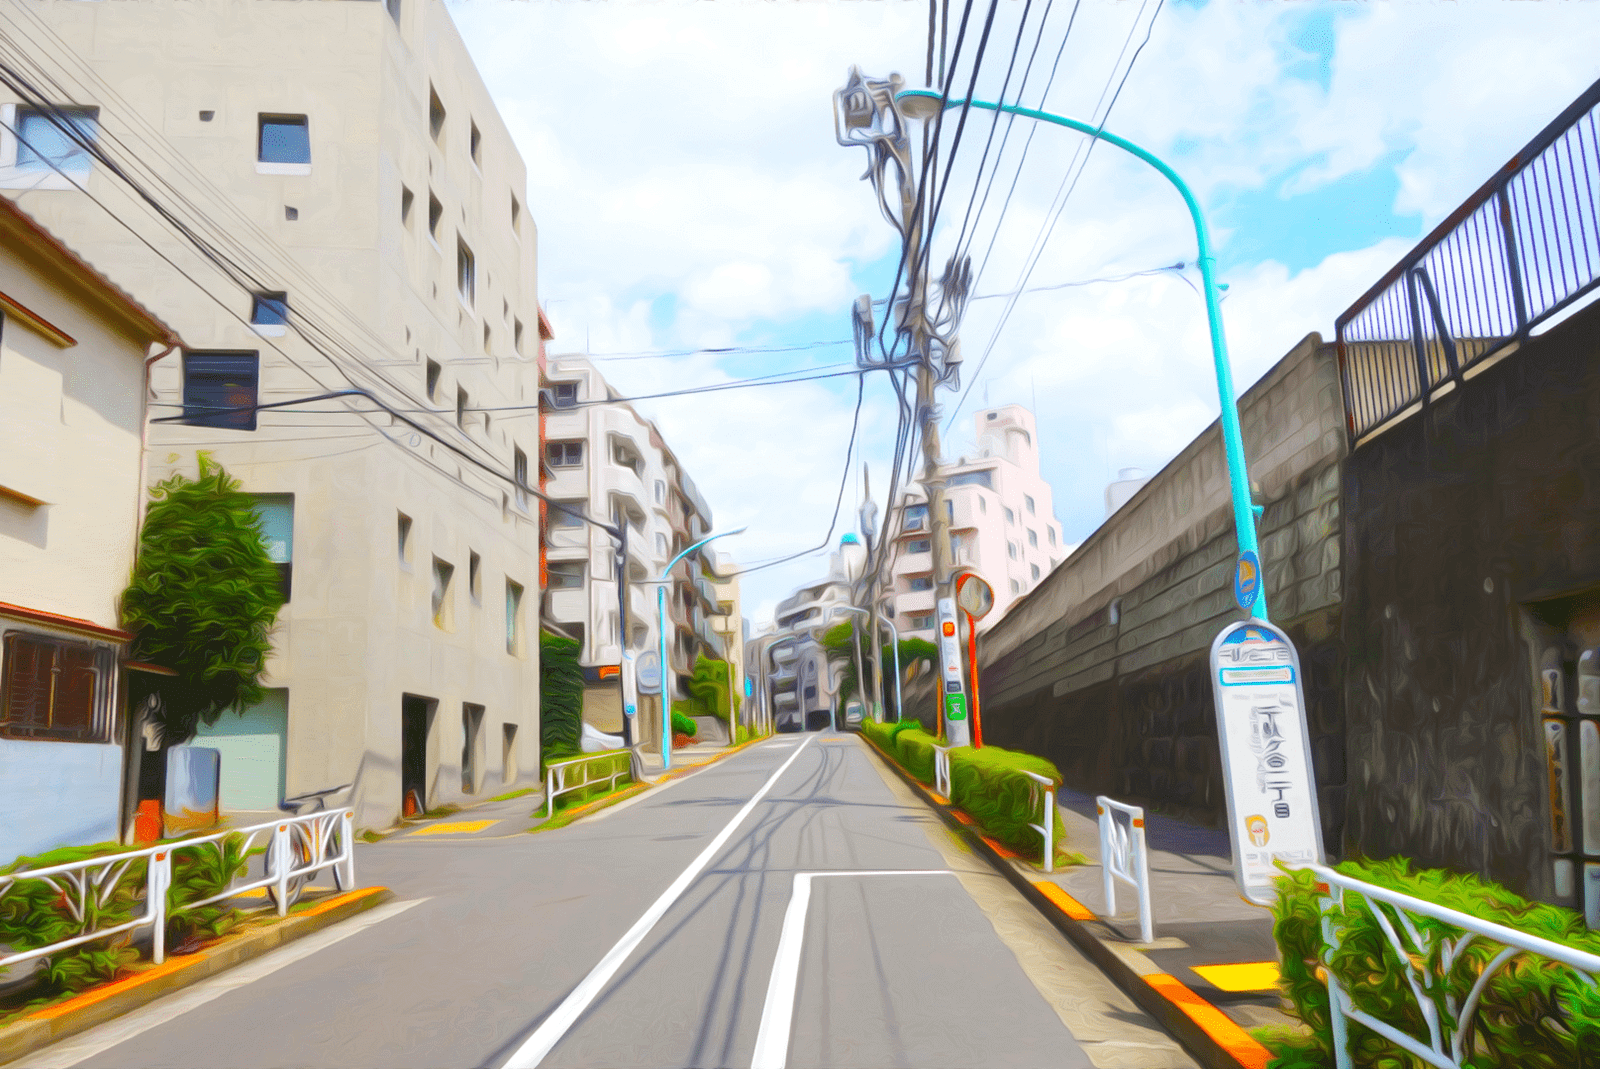
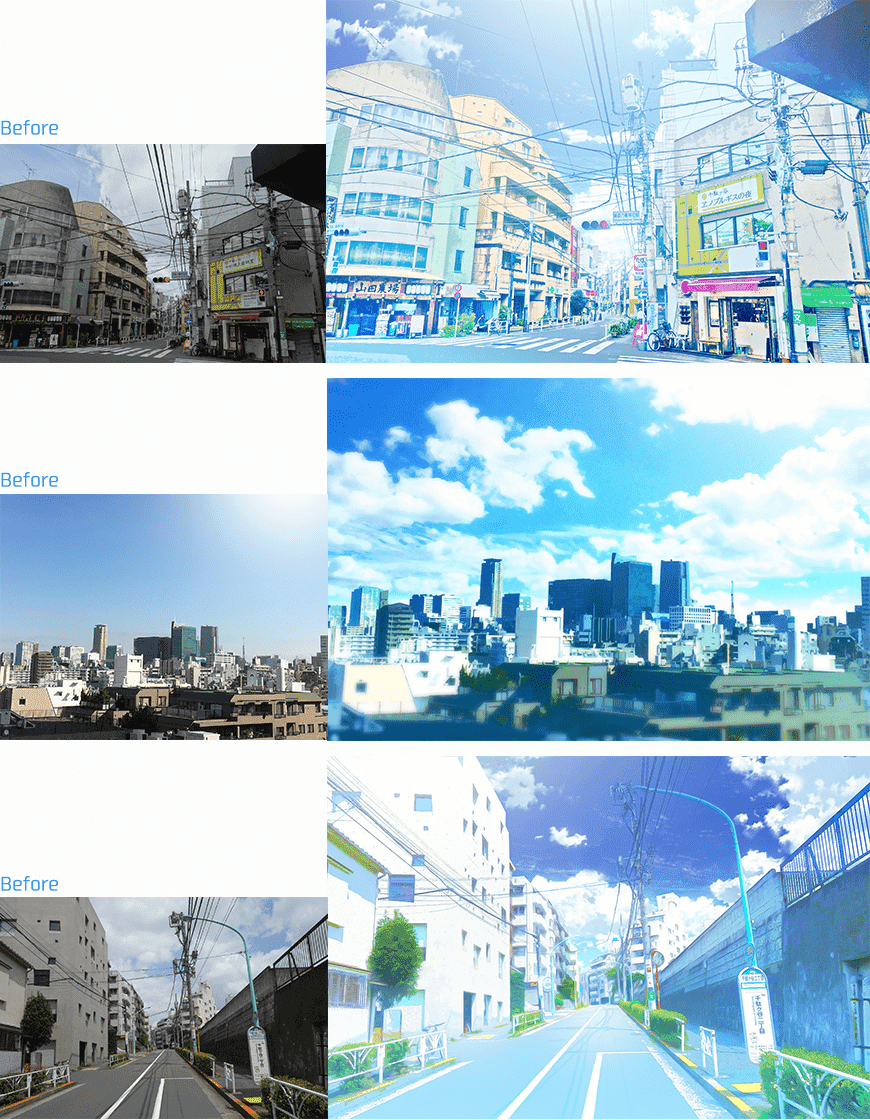
Beneath is the original picture.

This is a completely ordinary picture I took several years ago that was sleeping in some dusty folder on my estimator, just y'all might want to choose a picture where information technology is easy to remove the sky.
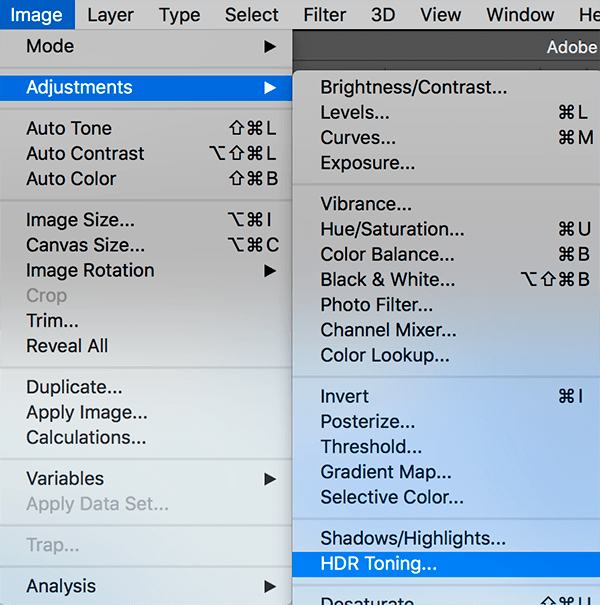
Select [Image] / [Adjustments] / [HDR Toning…].
There are many other sites that likewise employ the HDR Toning function in their instructions. I also use this function. To be honest, I really don't know how to utilise HDR Toning properly… it is easy to use because the adjustments are all in one place. But since information technology merges the layers, y'all will take to adjust the brightness, contrast, gamma, tone, etc. one past one with color correction if you want to practise these adjustments at a after time.
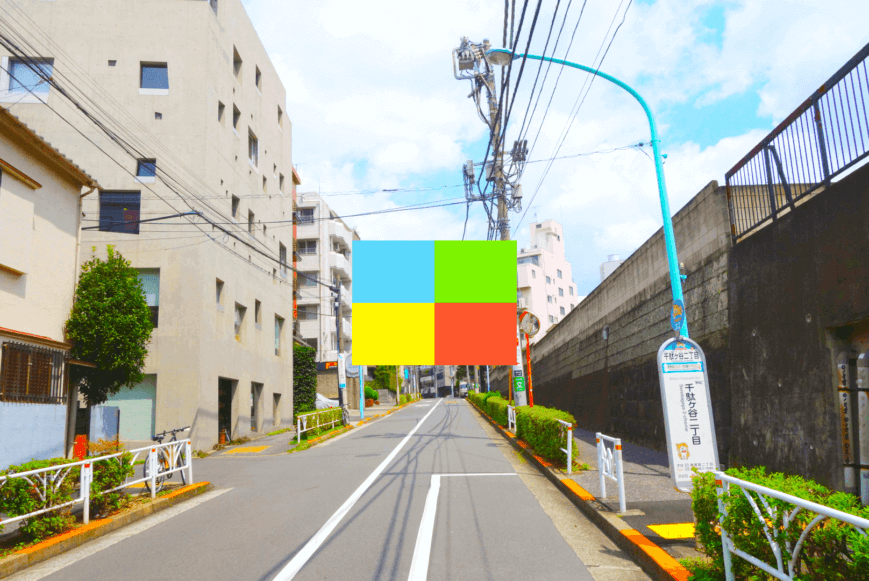
Alter the colors somewhat like this to a color palette y'all would never come across in a normal picture. I think it turns out just right if you shift the colors to the four reference colors in the middle. (my personal stance)
We volition copy this base layer and apply information technology after for a number of things, so make sure not to delete this layer.
Adapt the details
Now we utilize furnishings on the original picture to go far await similar an illustration.
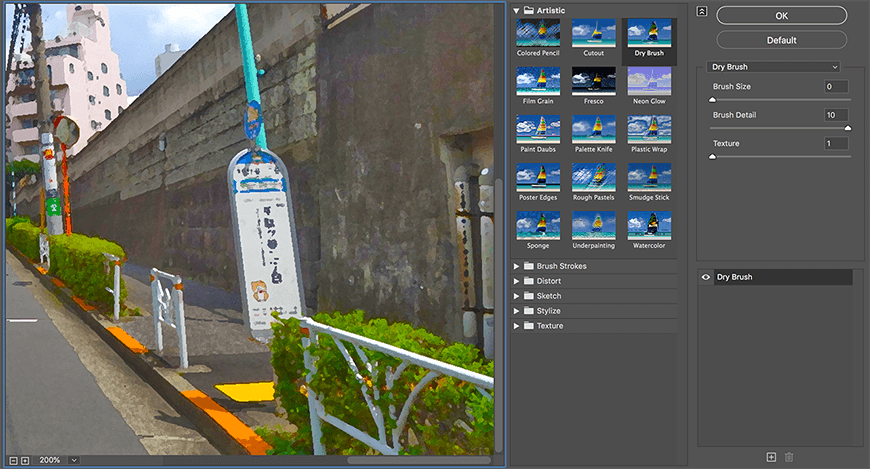
Copy the first layer with the adapted colors, and suit it like below using [Filter] / [Stylize] / [Oil Pigment…]. As long as you keep the general pattern intact, it is okay to melody the settings and twist the picture until information technology looks a bit weird.
But if you use this every bit is, the bushes in the forefront for example do look rather bad, and so re-create the get-go layer with the adjusted colors once again, use [Filter] / [Filter Gallery…] / [Dry Brush] on it, and partly combine the layers.
This is the combined picture↓↓
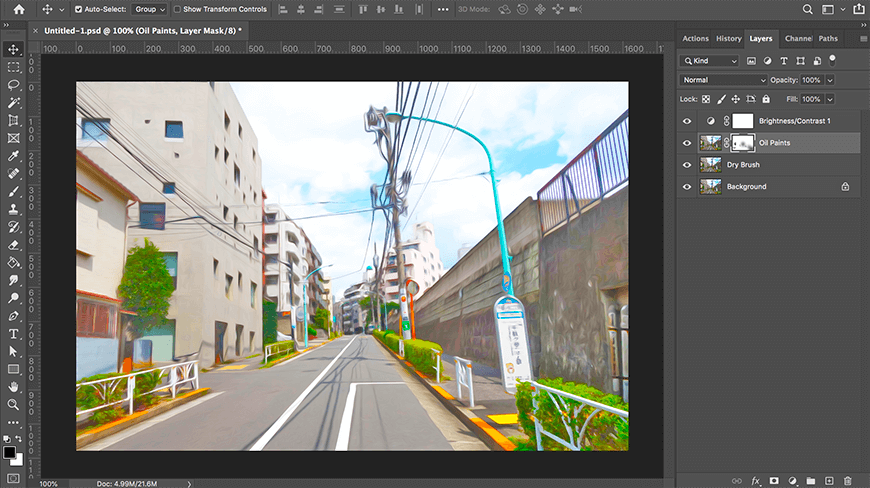
Employ a mask on the layer with the oil pigment effect, remove the part with the bushes and combine it with the dry out brush layer. I likewise increased the overall brightness of the picture.
Create layers for selected areas
Crete 3 kinds of layers to utilize in selected areas.
These are for the outlines, the dissimilarity, and the sky. This time I made layers like those below.
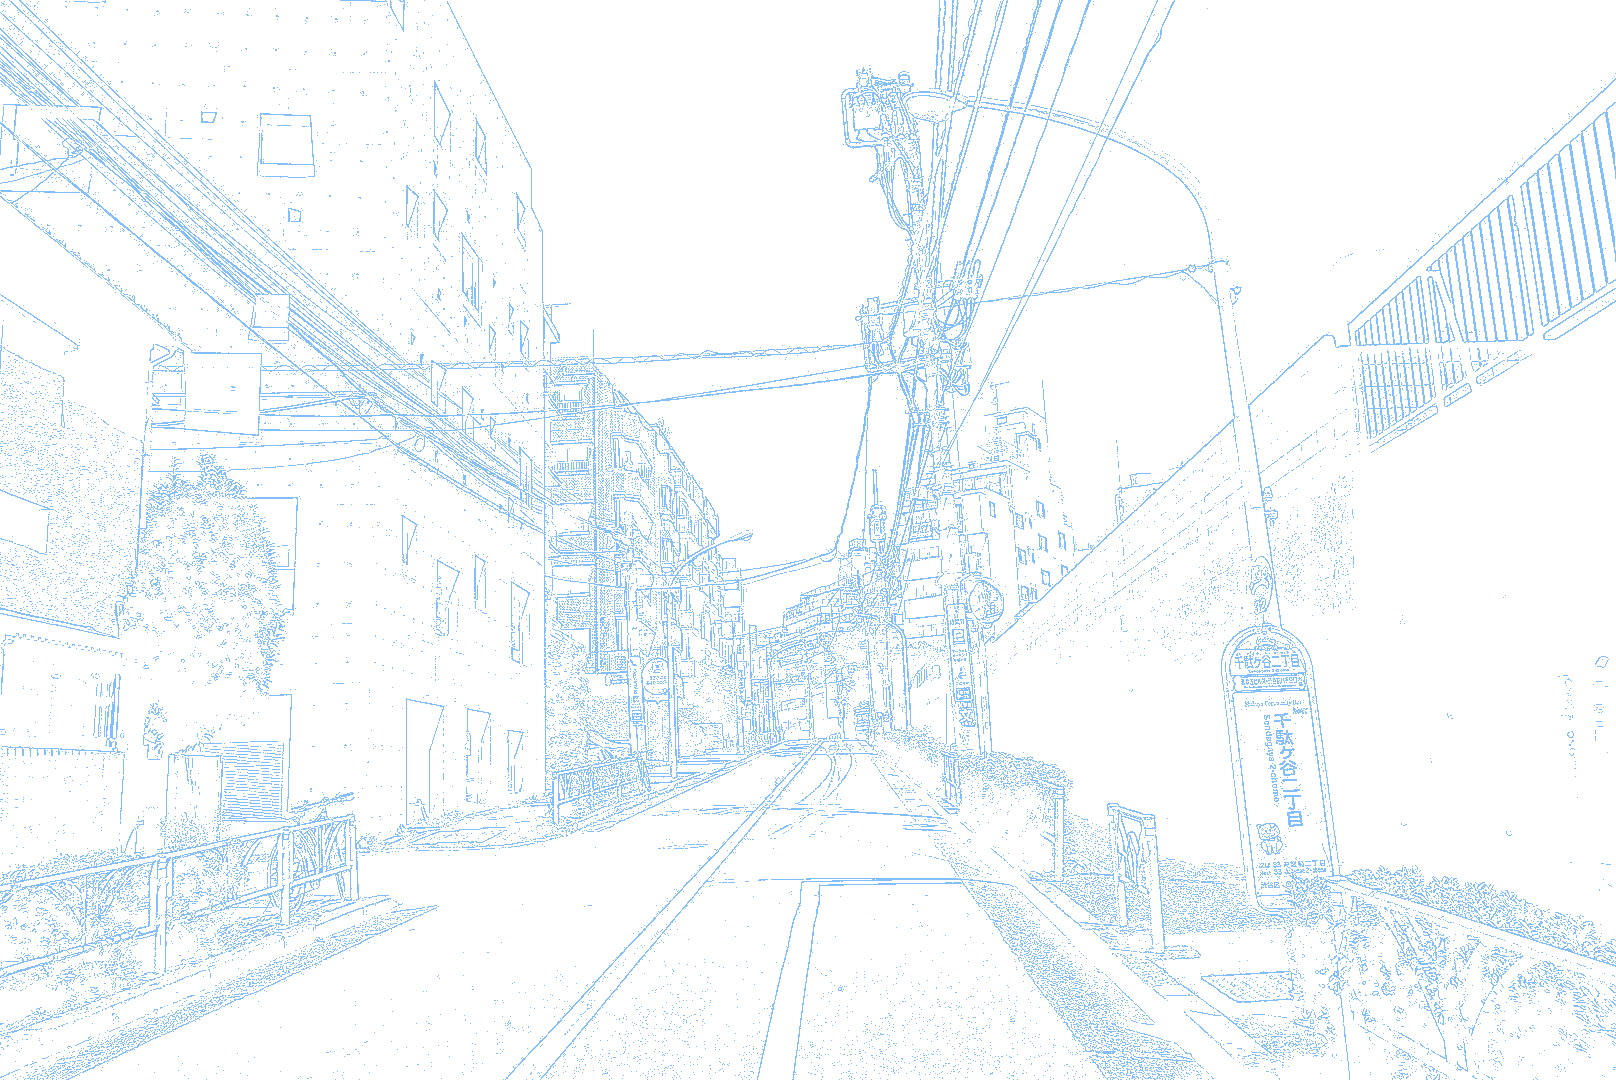
[For the outlines]
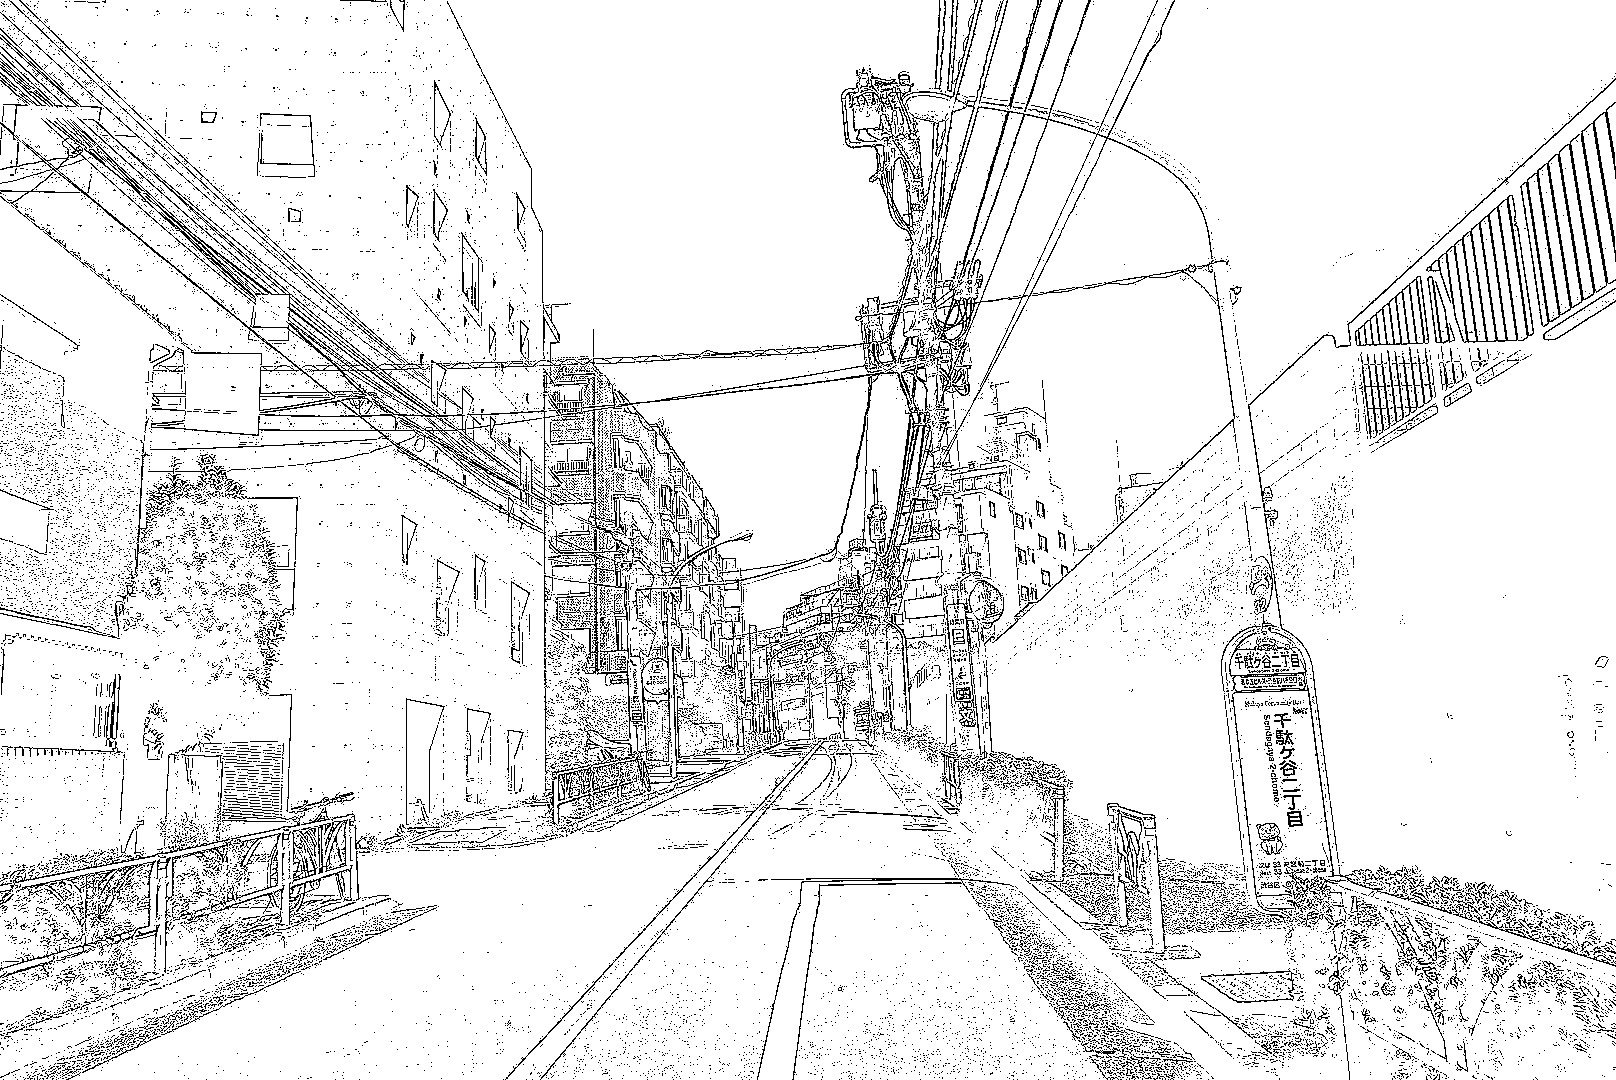
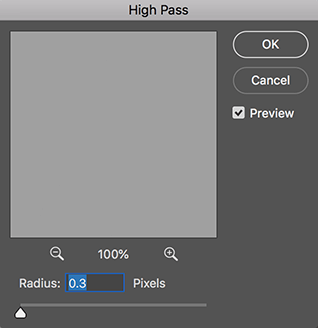
Copy the original moving-picture show layer, and select [Filter] / [Other] / [High Laissez passer…]. Setting the value to around 0.2 to 0.4 is just right in my stance (information technology probably turns to an about grey motion-picture show where you cannot see anything properly).
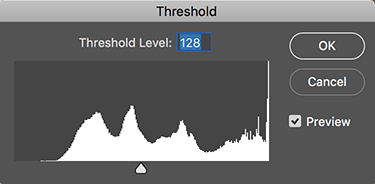
On this layer, use [Image] / [Adjustments] / [Threshold…], and arrange the values until they look similar the outlines in the epitome above.
There are besides other means of doing this. For some pictures, the outlines cannot be extracted properly, and in this case I recommend using the image tracing part of Illustrator.
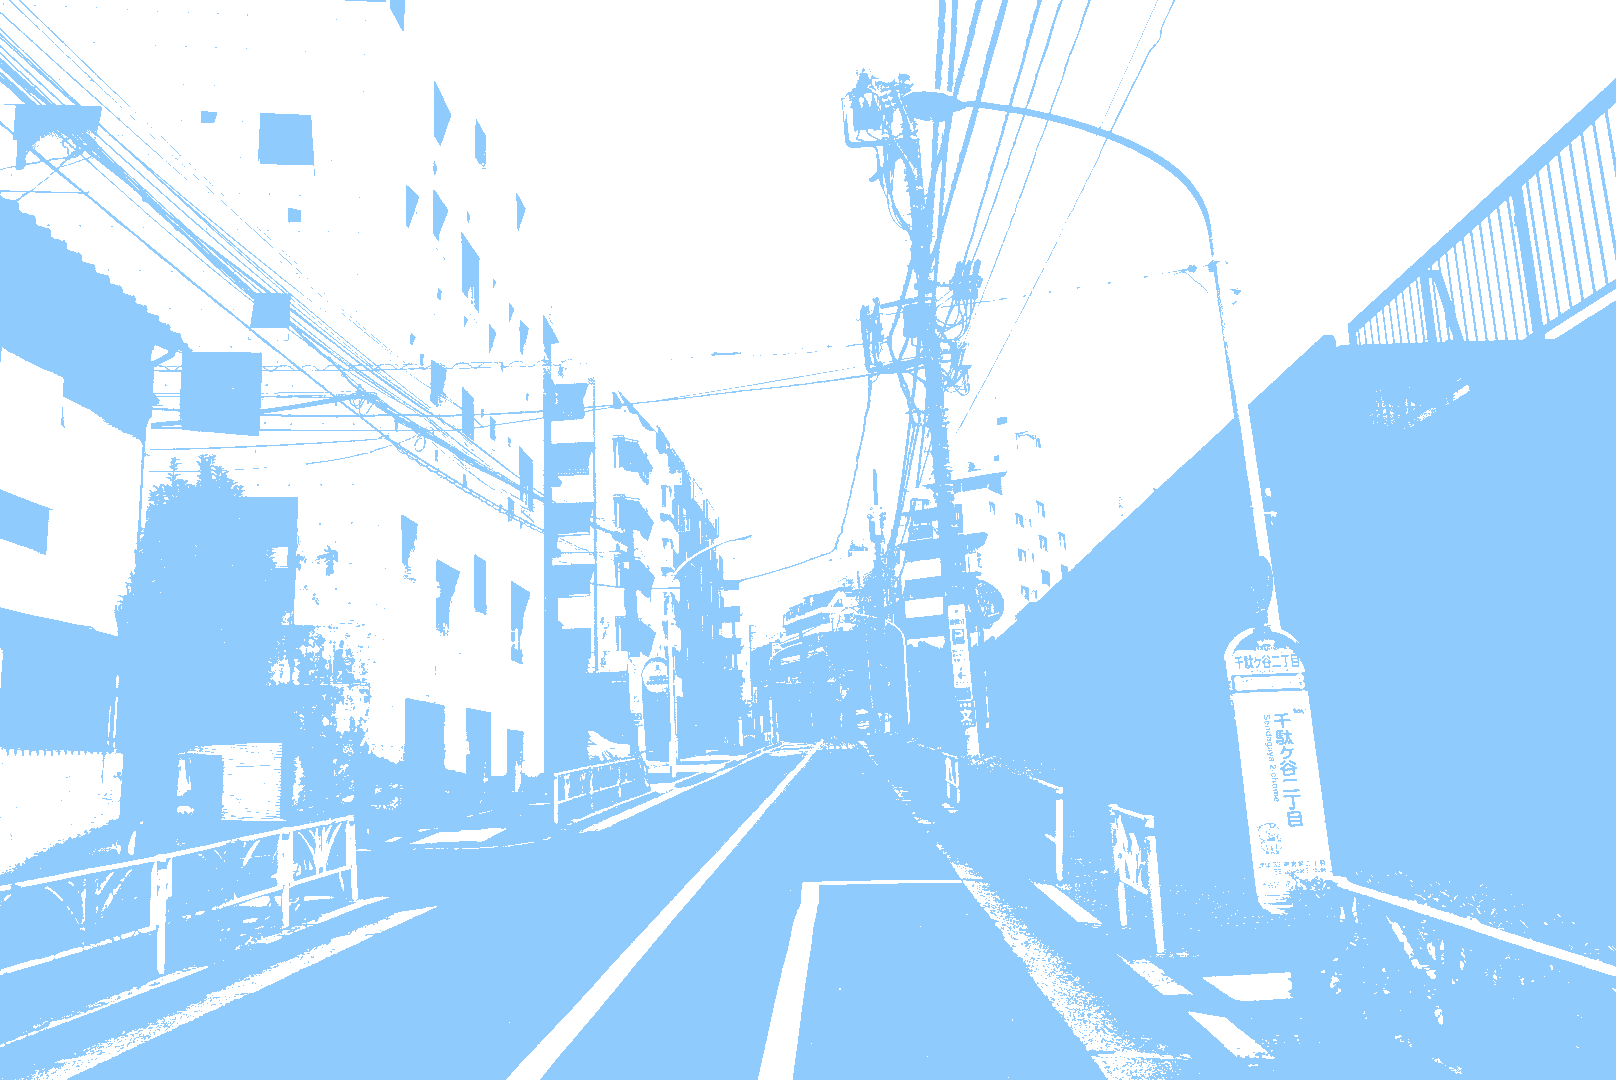
[For the contrast]
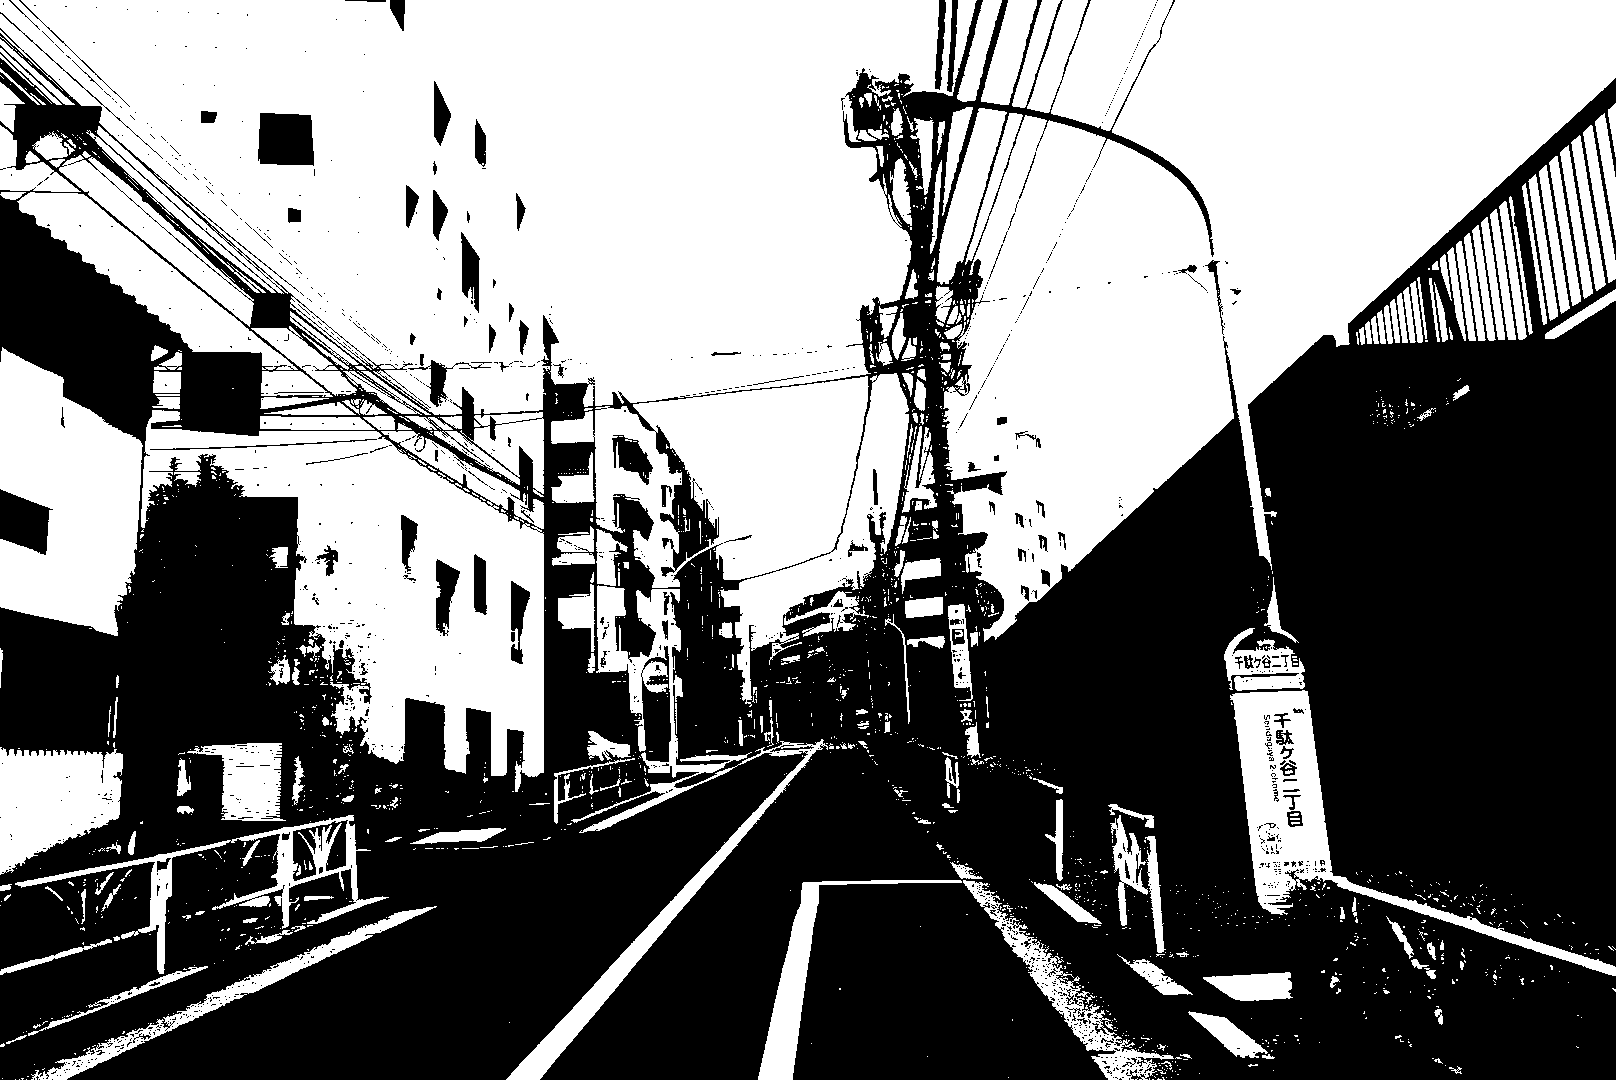
Copy the original picture layer and select [Image] / [Adjustments] / [Threshold…] on this layer. Adapt the values so the picture looks similar the epitome above. It is best if the heaven is removed at this signal, and so if the sky area is not properly removed, it might be better to cutting information technology out, or try adjusting the colors.
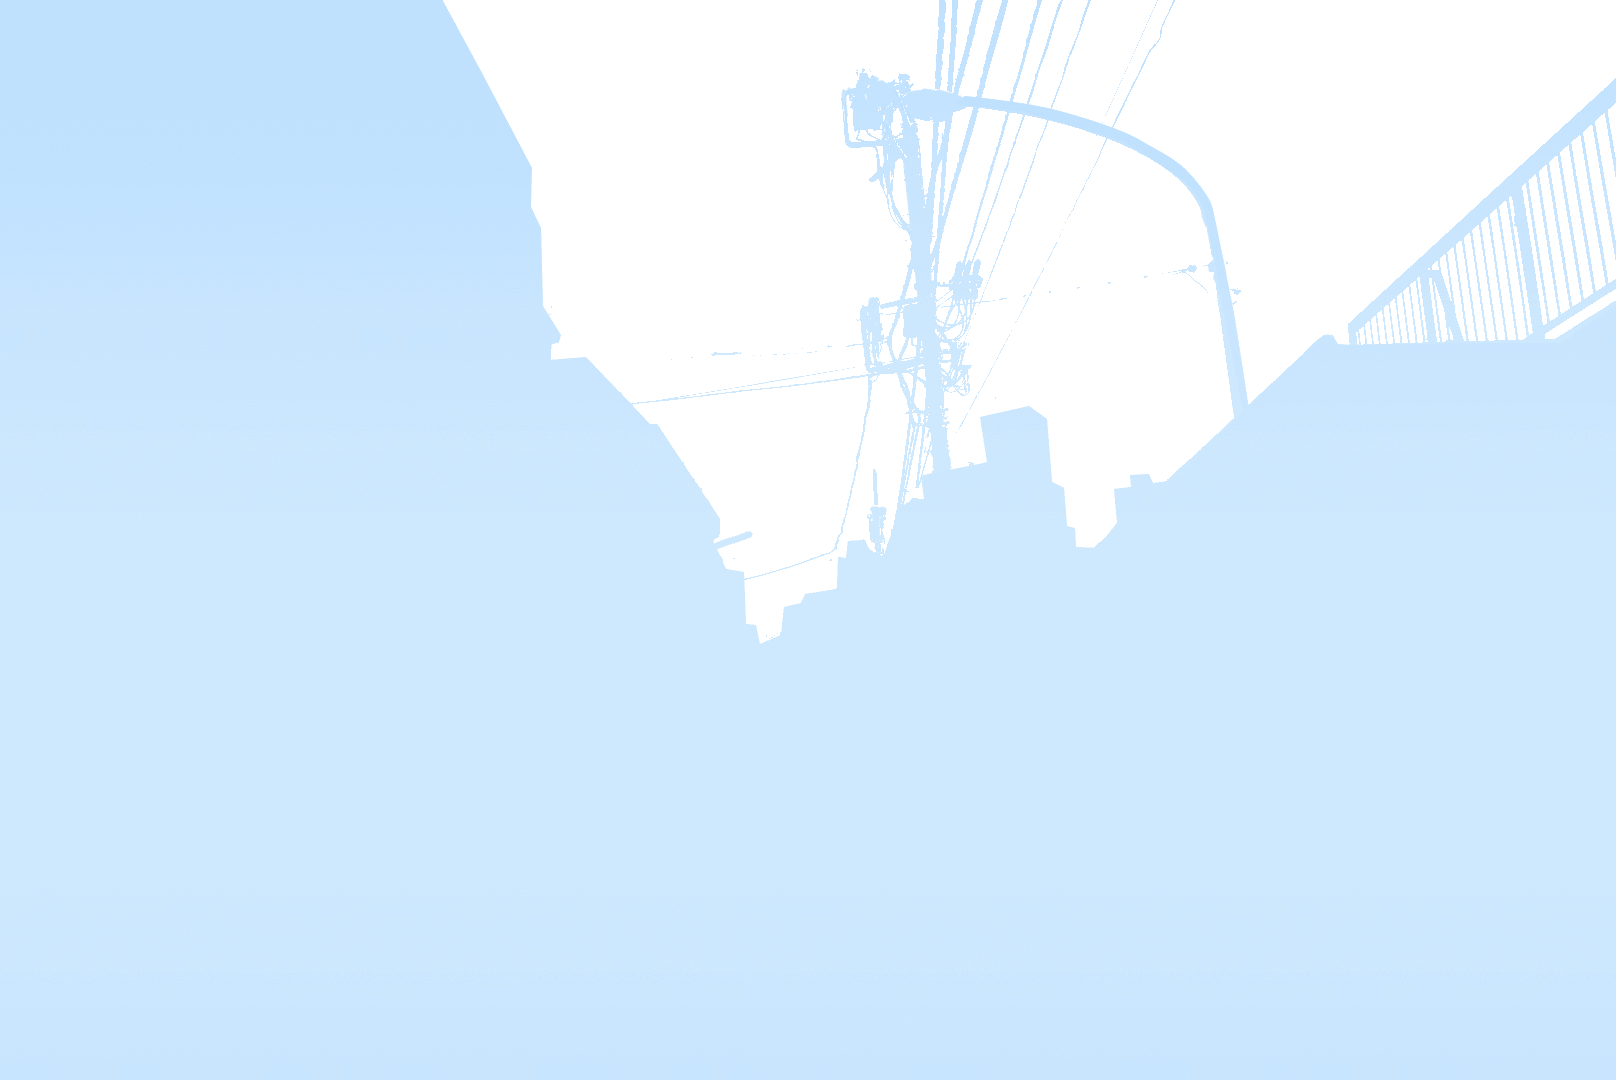
[For the sky surface area]
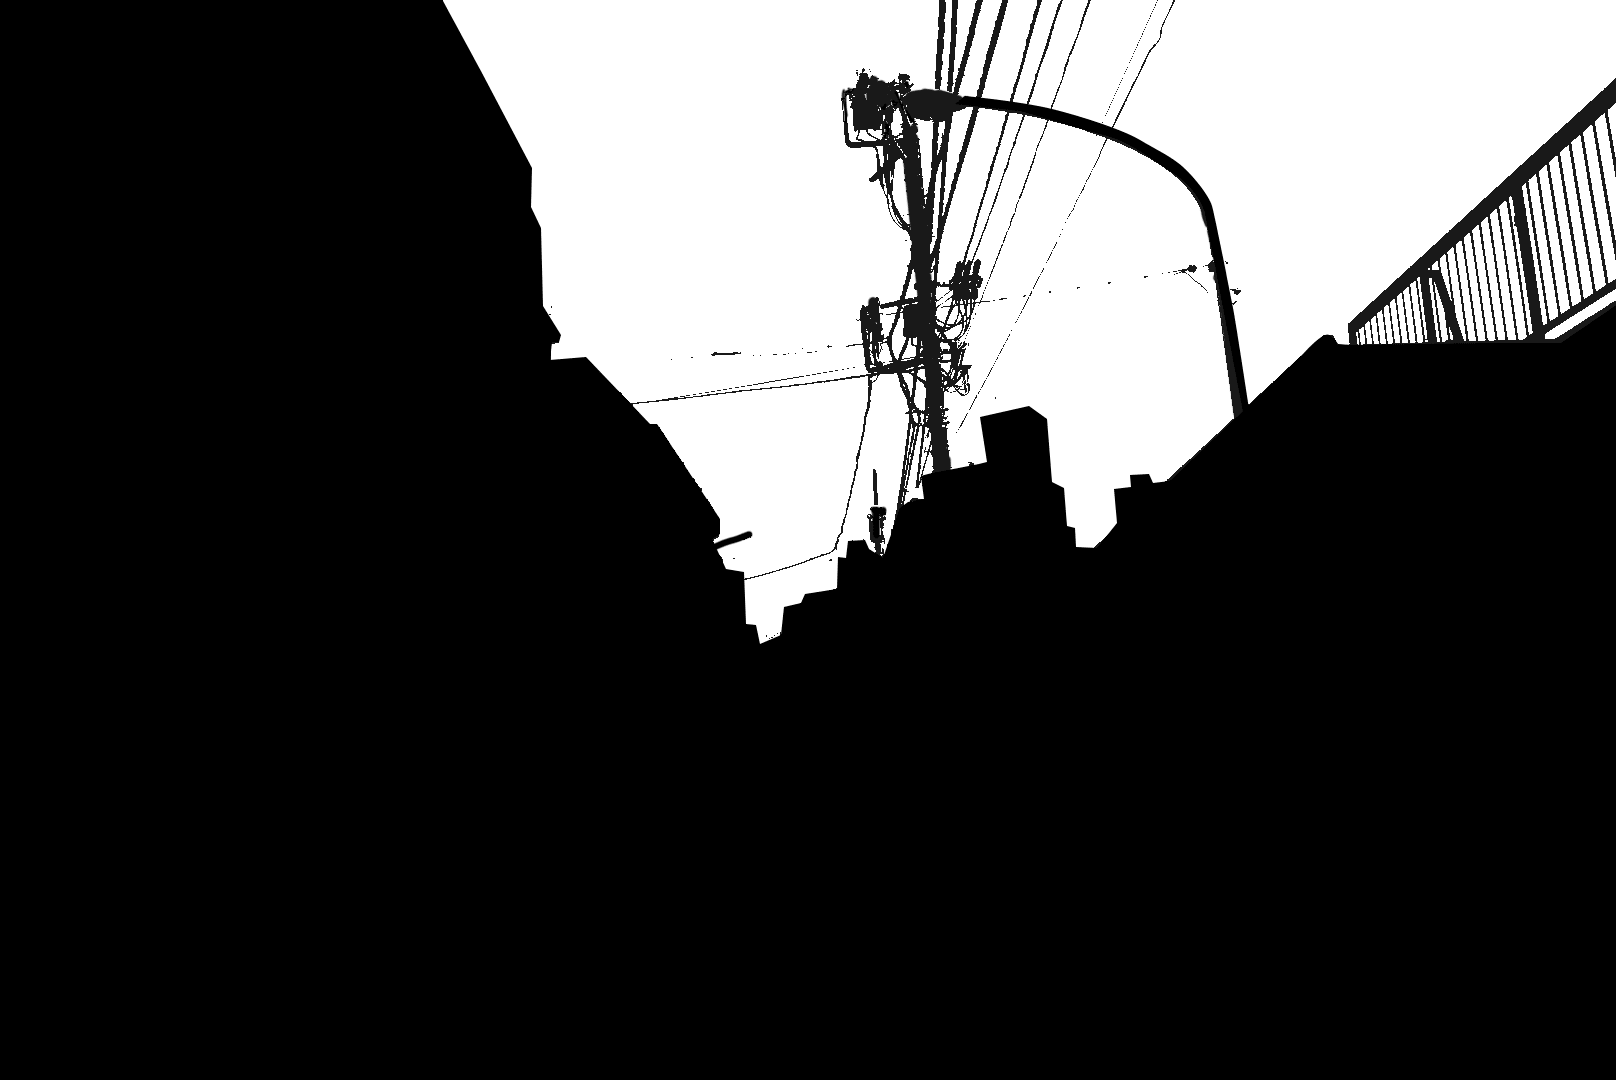
Depending on the picture, this might be the nigh difficult step, but try to create a layer where the sky area is removed like this.
Use [Prototype] / [Adjustments] / [Blackness & White…] to make the flick black and white, then use brightness, contrast, curves, levels, etc., laissez passer settings, or painting it over, to try and remove simply the sky area. Further caption is cut brusque… Finally use [Threshold…].
※ For the three layers above, it is okay to remove the white part and go out only the black areas in the layer (that is how I do it), but you can likewise set up channels. As long as y'all are able to select simply the blackness area later, it does not matter which method you
Increase the overall bluish tone
Utilize the 3 layers for the selected areas and adjust the overall blue tone then that they look even more like an illustration.
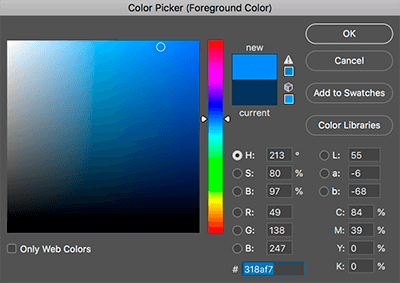
You exercise not have to use exactly this color. Select a color that looks right to you.
Use the black and white layer for the selected surface area, increase the blue tone, so add it on superlative of the layer we combined in the above for case by using multiplication.
※ Attempt to adjust with a transparent layer in the actual step.
[Filling in the layer for the sky]
Layer: color dodge / Fill: accommodate to about forty%
[Gradation of the layer for the sky]
Layer: Overlay

[For the contrast]
Layer: Multiply / Fill: conform to about 40%
[For the outlines]
Layer: Multiply / Fill up: adjust to most xl%
When yous merge all of these layers, then information technology volition expect something like this.

Heaven replacement and overall fine tuning
When taking a picture, you volition be dependant on the weather condition on that day and it is rather unlikely that you will become the weather for the sky that you would like to have, then it is a expert idea to take a picture of the sky separately, change it to look like an illustration and and then combine information technology into the flick. (caption of how to do that is abbreviated here)
(Since I had no good picture show for the sky at hand, I purchased and used one from a resource site. Distressing for cheating. Source: pixta)
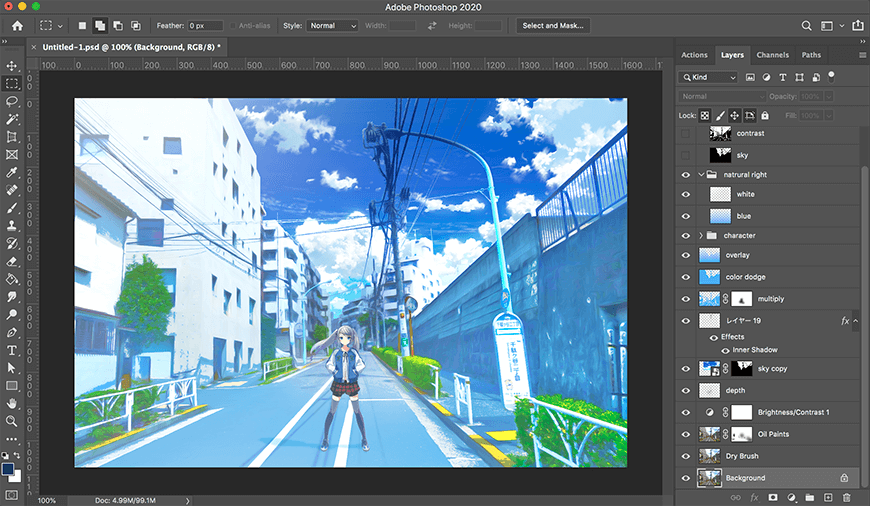
I once more adjusted the overall blue tones, added lighting furnishings, increased the contrast for the power cables, added a character, and did some other adjustments to get in await a fiddling more than like a Japanese anime. The terminal epitome is below. The layers are like this. As irresolute the temper of the sky has a great impact on the overall mood of the picture, it is best to choose a picture in the commencement where the sky can be hands removed, fifty-fifty if the original sky is clouded.
I did the aforementioned changes for some other pictures besides.
I made a somewhat rough video of how I created this image.
Please watch if you are interested.
Official business relationship of Bricoleur
Other images are summarized on Twitter.
- はてブ

関連コンテンツ
DOWNLOAD HERE
How To Edit Photos To Look Like In Anime
Posted by: griffiththapood1954.blogspot.com
0 Response to "How To Edit Photos To Look Like In Anime"
ارسال یک نظر